

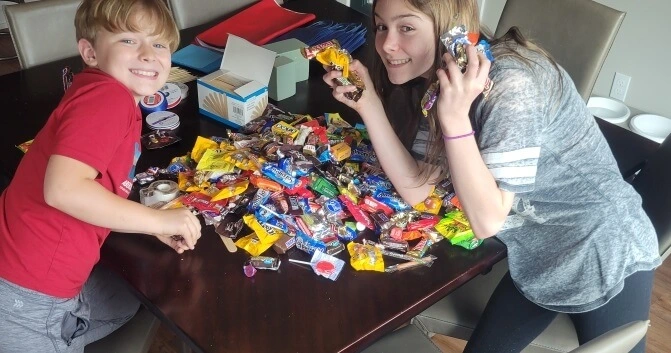
The amount of Halloween candy our kids collected this year was insane! Fortunately, more joy was experienced by collecting, rather than consuming the candy. After a week, the pillowcase sacks filled still brimming with candy had found a semi-permanent home in the pantry.
Inspired by a radio commercial, our kids decided to donate most of their remaining candy to Veterans!
Note: My kiddos are quite amazing individuals, but this altruistic candy gifting was a shock to me this year. Typically, after about a week, I move the pillowcases to the top shelf of pantry, where they reside until the following Halloween, when then eventually make it into the trash. It’s not an impressive exit strategy, but we all feel like winners – the kids keep their candy, but don’t every piece.
Knowing better than to look a gift horse in the mouth, I was happy to support their philanthropic effort. After meticulously sorting through their candy, we had a large grocery bag sitting on our back counter waiting to be delivered to the local Veteran’s Home on Veteran’s Day. Without question, the contents would be enjoyed, but somehow dropping off a large bag of candy seemed odd and not special. This unsettled feeling stayed with me for several days.
Yesterday, waking at an hour that was far too early, my brain bounced around from topic to topic. I’d like to say this has never happened before, but sometimes waking up before the alarm can be quite productive. On this morning, after revising our dinner menu, purchasing a birthday gift, and responding to a few work emails, I started a Target pick up order. Into the cart went wooden skewers, Styrofoam blocks, and ribbon. I had an idea. Rather, I had a solution, a way to make the candy feel special – candy bouquets designed by the donors themselves. The kids were excited, and so was I!
After spending just over an hour sorting, decorating, and arranging candy after school, we have several candy bouquets ready to be delivered tomorrow!
This was a fun project because it required just few items (many of which you might have at home) and a little creativity.
Our project took about an hour and 15 minutes.
Supplies:
Styrofoam blocks
Tissue paper
Ribbon
Candy
Wooden skewers
Tape
Step One:
Wrap Styrofoam in tissue paper
Step Two:
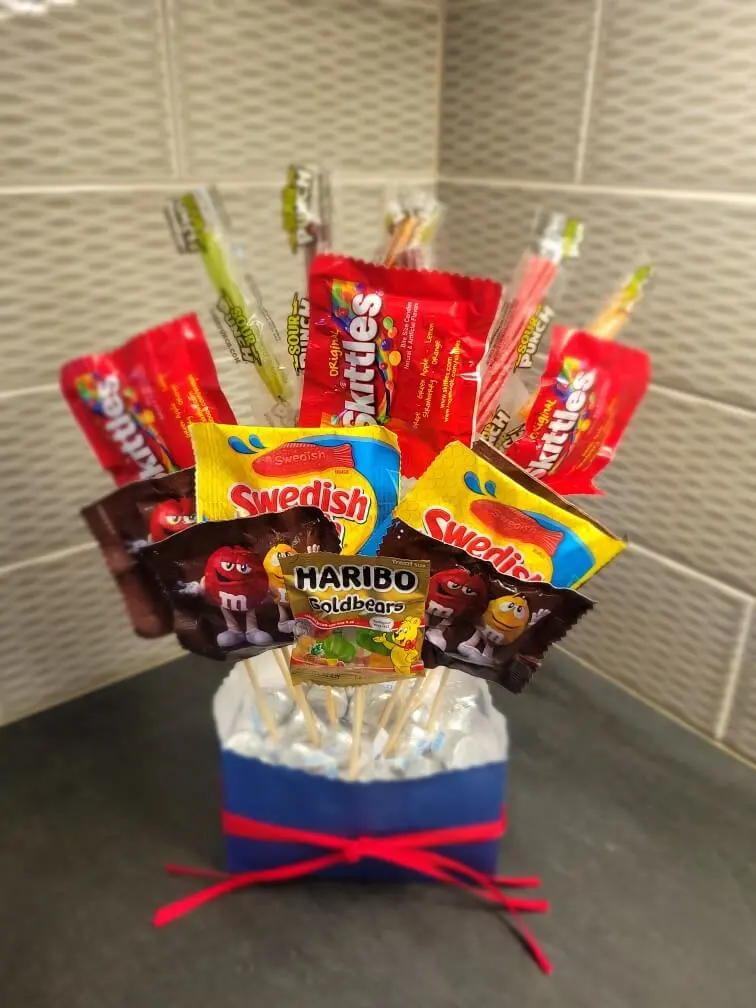
Select the candy that you intend to use on your bouquet. 10 – 14 pieces worked well for our bouquets.
Step Three:
Create the design layout.
Tip: If you take the time to lay out the candy, including assuring that the candy packaging is all going the same direction it does make a visual impact. Our kids weren’t too into this and bouquets turned out great, so the level of preciseness on this step is your call.
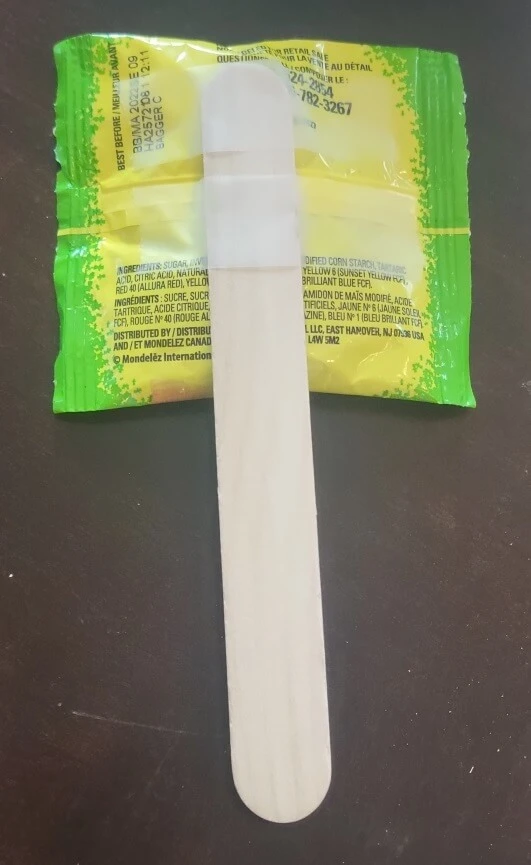
Step Four:
Flip the candy over and tape the skewer to the candy. We found that two pieces of tape worked best.
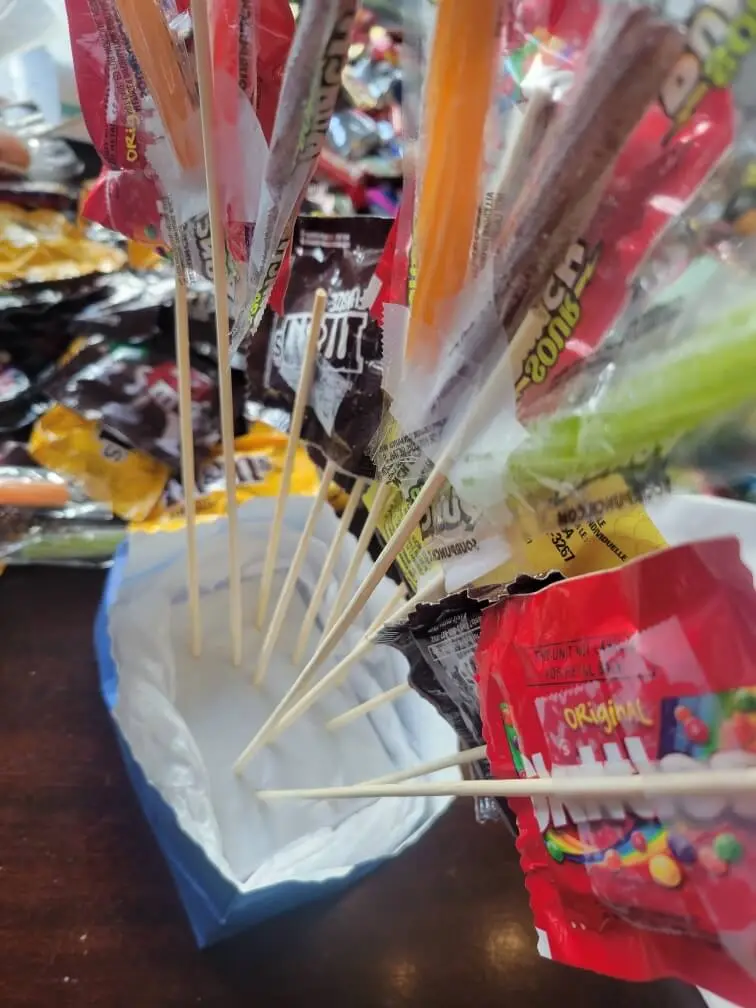
Step Five:
Place the skewers into the Styrofoam block.
Step Six:
Finish by placing in a bag and tying with a bow.
If you find yourself with more candy than you need and want to share it with others, this was a simple project that was easy for the kiddos. Our candy bouquets have transformed a sack of candy into creatively crafted gifts. We are grateful for our veterans and hope at these small tokens of gratitude help our local veterans to feel celebrated.